Ubuntu Partitioning Guide
 Welcome to the Ubuntu Partitioning Guide. This tech guide will show you how to manually partition your drive for an Ubuntu installation. If you are directed here from the Install Snow Leopard Mac OS X Onto Any Laptop article, you are now at the last stage of the whole installation phase. Follow the partitioning guide and finish off with the installation of the GPTsync and you should get a full functioning triple boot laptop with Snow Leopard, Windows 7 and Ubuntu.
Insert the Ubuntu disc and as usual, get to the partitioning screen. This is the part where it is different.
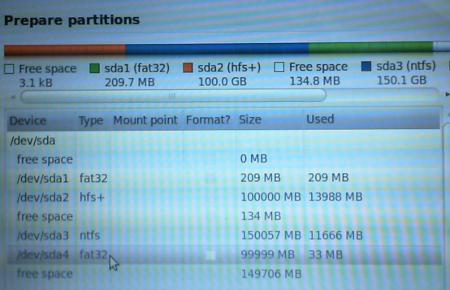
Instead of allowing Ubuntu to allocate the drive space for you, you will need to specify it manually. You should see all your partitions in there. Click on the drive that you have allocated for the Ubuntu installation. Don’t worry about the 2 or 3 free space that is only a few hundred megs in size. Don’t touch that, those little spaces belong to the boot record of the Mac and Windows. If you have followed the install Snow Leopard onto any laptop guide so far, your choice to click should be /dev/sda4.
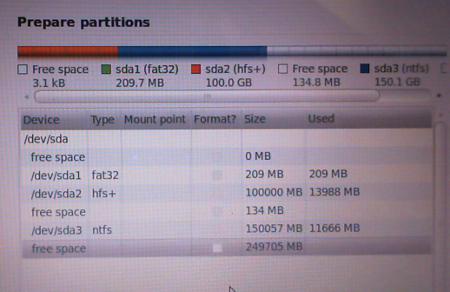
Click on that /dev/sda4 followed by the delete option. Now it should read free space. Now in Ubuntu, you will need to specify 3 partitions.
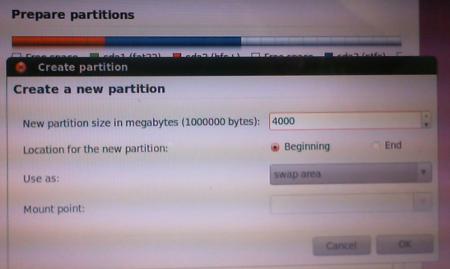
A Swap partition that functions like your rams except that it uses the hard drive. So you can allocate the standard which is double of how much rams you have. But since we already have a lot of rams these days, we do not need to waste those space on them. Click on the same free space that you have just created by deleting the sda 4. Select “Add”, type “2000” in the partition size and choose “swap” under the “Use as” and click “OK”
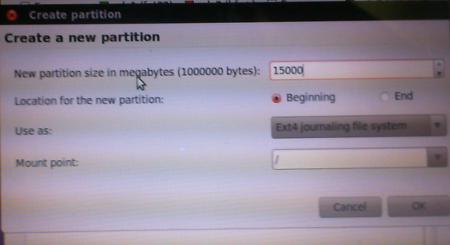
Now to create the Mount point. Click on the free space again, and add. Type in the amount of space you want to allocate for the applications to be installed in Ubuntu For instance, 15000, choose “Ext4 journaling file system” for the Use as: and for the Mount point select “/”. Click OK
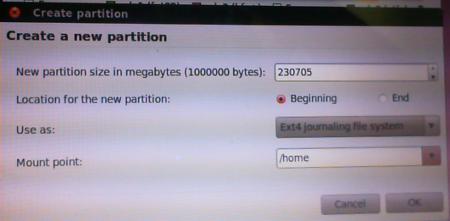
Click the free space again [ which is obviously getting smaller and smaller ], and select Add. You can use the full amount there of what is remainding in that partition. Choose “Ext4 journaling file system, and choose “/home” for the Mount point. Click Ok.
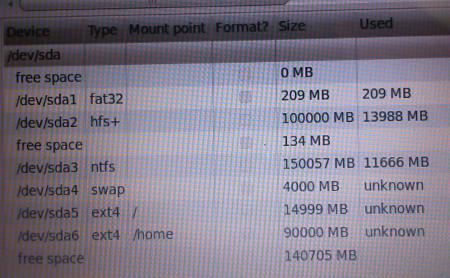
Now the partitioning is done and simply click forward to finish up the installation. You should get a partition outcome similar to this image.
Upon rebooting, you will see the Ubuntu boot menu with all your operating systems there. For those who are doing the triple boot with Mac OS , Win 7 and Ubuntu, you will notice that Windows is not able to load.
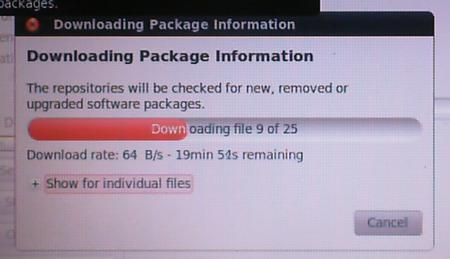
Enter Ubuntu and get online. Reload your respsitories and you will need to install the Gptsync. Click on System => Synaptic Package Manager. Click on the “Reload” button. Allow it to download all the updates.
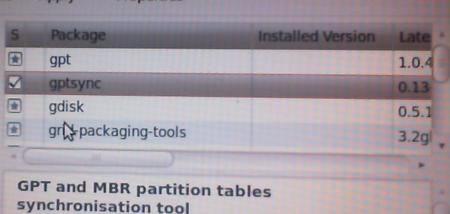
Once the updating is done, type “gptsync” in the quick search box. You should see the gptsync showing up as the second choice. Put a tick on it and allow it to install.
Once you are done, click on the Applications => Accessories => Terminal. Type this command
sudo gptsync /dev/sda
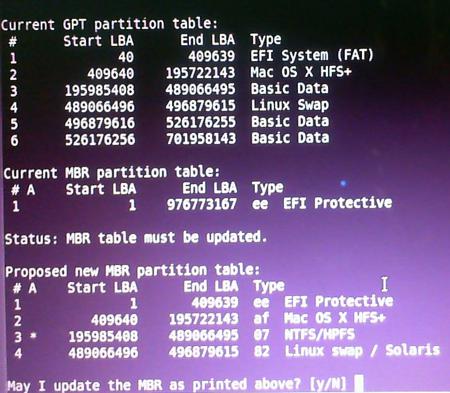
You should see the message asking you if you allow it to update the partitions, type “y” and hit enter.
Reboot and all 3 operating systems should load fine without issues. I hope this Ubuntu Partitioning Guide is easy for all to follow. For those who have been following the Install Snow Leopard Mac OS X Onto Any Laptop article until now, your adventure is finally over. I must admit that I am not a pro at Mac, so if you really do run into problems while you are installing the Mac OS, I may not be able to help. But I can try. Good luck on your Hackintosh adventure.
Leave a Reply
You must be logged in to post a comment.