Root Samsung Galaxy S3 Mini GT-18190 N
It’s been like a couple of years since I have written guides on how to root Android phones. My hands are once again itching for another round of rooting. In this guide, I will show you how to root a Samsung Galaxy S3 Mini GT-18190 N. Take note, make no mistake, there are 3 variants of the Samsung s3 Mini and the guides in XDA are more relevant to the GT-18190 only without the letter N behind. The letter behind makes a hell lot of difference. I followed the wrong guide and ended up soft bricking the phone. With a stroke of luck, I revived it. My advice to you is not to try using any of the root kits, or packages like the Unified_Android_Toolkit_v1.3.4. Do not get me wrong that these packages are bad. They work for other models, but not for the GT-18190 N
There is only one way out, after trying tons of rootkits. Before we start, do take note that you are solely responsible for your own actions and I will not be responsible for any damage to your device if you choose to follow my guide. Nevertheless, as always, my style is to provide the safest approach with a safety net that should not get anyone being left with a broken phone.
STEP 1 – Backup all your data that is important to you.
I understand that the concept of rooting is that you will not lose the data and the phone will be intact, it is just going to be rooted. Please note, as there is no way for this Samsung S3 Mini GT-18190 N to be rooted by conventional means. You will lose all data, and the rom is going to be another rom which is pre-rooted.
Standby an original stock rom for contingency and emergencies. Please download it here from Samsung.
STEP 2 – Pre configuration
1) Charge the battery to a full capacity
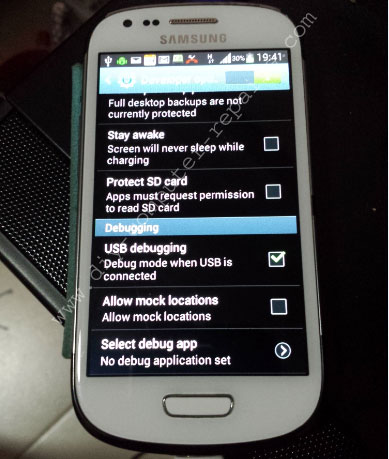
2) Turn on the usb debugging mode. This mode is required otherwise you will not be able to enter the download mode
STEP 3 – Flash a custom rom over
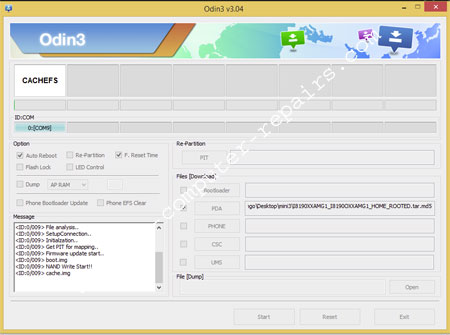
Download this package. It contains the odin and the rom in a single archive
Turn off the phone and get into download mode. Press the Home button plus + Volume Down + Home button until the device turns on. Once you see the Samsung Logo, release the power button but keep holding on to the Volume Down and the Home button until it gets to a warning page, after which you must press volume up to get into the download mode. At this point, Odin should detect your phone and you should be able to flash it over.
After flashing the custom rom over, you will now be able to boot into a custom OS which may take quite a while to boot up. Just allow it to load up and run for a while. You will notice that some apps will error and crash out. But that is perfectly fine. The rule of thumb is to allow the super user app to kick in, so that we can install another software that will write into the device for us to take control and flash other custom roms.
STEP 4- Flash the TWRP
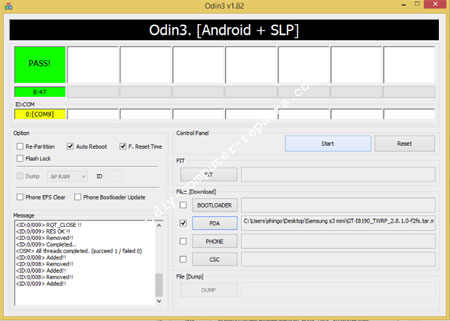
Remember to check the settings and enable the usb debugging mode again, as the custom OS had the settings turned off. Now enter the download mode again as per instructions above. Download this file. TWRP is a special loader that can load up before the Android OS so that you can perform special tasks. Via the same odin screen, select the TWRP file and it will flash over
Now if you power down your device, hold the home button + Vol up button and power button. Upon seeing the Samsung Logo, release the power button and keep holding the home button and Vol up button and you will enter the TWRP.
In order to flash a custom rom over, copy a zip file into an SD card and pop it into the phone. Using the TWRP, use the wipe to clean the device first. Then choose install and navigate to the zip that you have copied and let it install.
You can download any of the roms here to try flashing them till you get one you like
http://forum.xda-developers.com/galaxy-s3-mini/development
I noticed that the USB debugging mode might get disabled after flashing a new rom. When that happens you will not be able to enter TWRP. So remember to enter the rom to turn the USB debugging mode back on. This is not a bug.
Leave a Reply
You must be logged in to post a comment.