Repair Windows XP
Windows XP Repair Using CD
 If you’ve tried the XP Restore & you’re still having problems, then let’s use the Windows XP CD to repair your Windows XP installation. A repair Install will replace the computer system files with the files on the XP CD which can quite often mean not having to resort to a format. It will leave your computer applications and settings intact, but Windows updates will need to be reinstalled.
A Windows XP Repair will replace files altered by computer viruses and spyware, but will not repair a virus or spyware infection. Therefore if it is an infection preventing Windows from operating correctly, I would suggest you try to boot into safe mode first & attempt a system scan. If however you antivirus or antispyware does not permit scanning from within safe mode then be sure to scan your system as soon as it is repaired. If you do not have an anti virus, here is a list of Free Antivirus available on this website.
The Windows XP Repair procedure.
Insert the Windows XP CD-ROM and reboot your computer. As soon as you see some text appear on the screen, press F12 repeatedly & this should then allow you access to a list of boot devices, select CD ROM. If however your system / BIOS does not recognise the F12 key, then reboot your PC and this time press the Delete key repeatedly as the text appears on the screen. This will open the BIOS setup feature, where you can manually select your boot devices. (see motherboard manual for details)
Once you have the correct boot device selected, re-boot your PC & when prompted, press any key to boot from CD .
If you do not get that message it means that you have not selcted the correct boot sequence in your BIOS & will have to repeat the steps above. First, Bookmark This Page, so you can easily return and continue the installation.
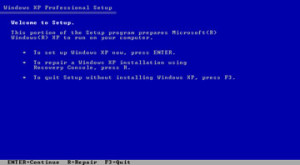
When the CD loads press ENTER to setup Windows XP. DO NOT PRESS “R” TO REPAIR! Pressing R now would take you to the Windows XP repair console, which is a different thing entirely.
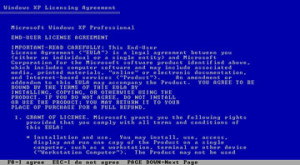
Press F8 to accept the agreement with Microsoft.
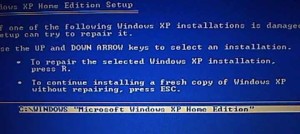
Now using the arrow keys, select the drive for your Windows XP installation and press “R” to repair.
Click Next.
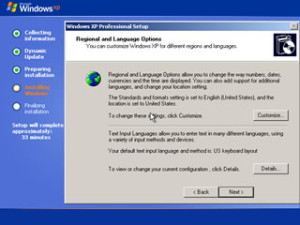
On the screen below enter your Regional & Language details then click NEXT
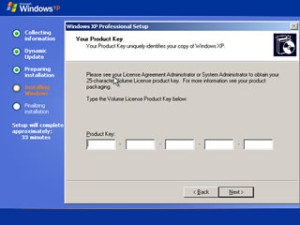
Enter the Windows XP CD key.
Note: If you are using a recovery disc that came with your PC then you probably will not get this screen as the details are actually on the disc itself.
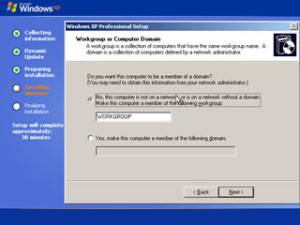
Setup Workgroup: Enter MSHOME and Click Next unless your computer is at the office & uses a different Workgroup, in which case enter the relevant details and then click enter.
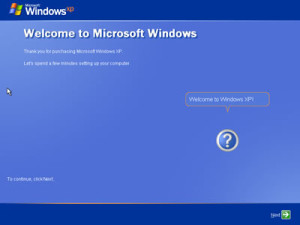
Again press Next! We are almost done repairing , we have almost finished repairing your XP installation.
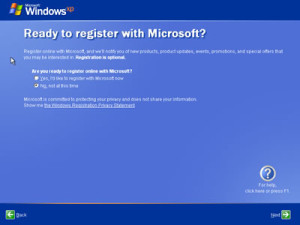
I would advise you to Choose No when asked to Register.
Note: If you register your copy of XP to any particular PC, then should you ever change your entire PC or Laptop, you will also need to purchase a new Windows XP disc.
Congratulations! You have repaired your Windows XP installation.
Remember that repairing Windows XP has not removed viruses or other malwares. If you didn’t scan for viruses earlier, then I highly recommend you do so now!
For that you need to update and run your anti virus. If you do not have an antivirus click here for a list of free scans and antivirus software on this website. However, if you still have a virus or spyware infection, you may well find that it will block any attempt to download or install an antivirus program. If this is the case then I suggest you try the Microsft Malicious Software Removal Tool. If you have kept your PC upto date with MS Updates then you should already have this installed on your system, follow the link for full instructions on it’s use.
Remember that your Windows XP is not repaired until you scan your computer. What you have done is treated a symptom, you have not yet dealt with the cause.
Leave a Reply
You must be logged in to post a comment.