Notebook Upgrade Memory
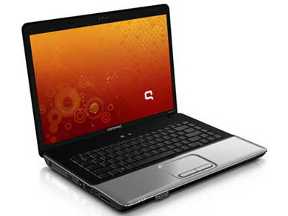 Notebook memory upgrade can help to speed up performance, upgrading of memory can be a DIY repair issue without sending in to a professional computer expert. DIY computer repairs will show you how to upgrade notebook memory as well as the hard disk yourself with clear photos and explanations.
This article uses a HP Compaq Presario CQ40 series notebook as demonstration. If you are doing the upgrade to another notebook, exercise caution and watch for additional screws and latches. Do not pry or force open in anyway as this will result in permanent damage being done if any part ends up being broken.
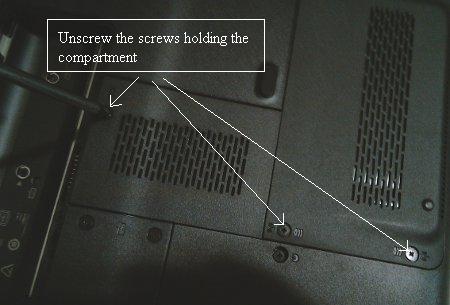
First unplug the power cable off the notebook and remove the laptop battery. Press the ON button once to discharge any remaining power in the laptop. Unscrew the screws to the compartment that contains the ram and hard disk. If you unscrew the wrong compartment just close it back.
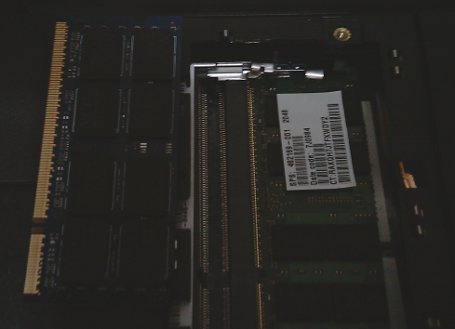
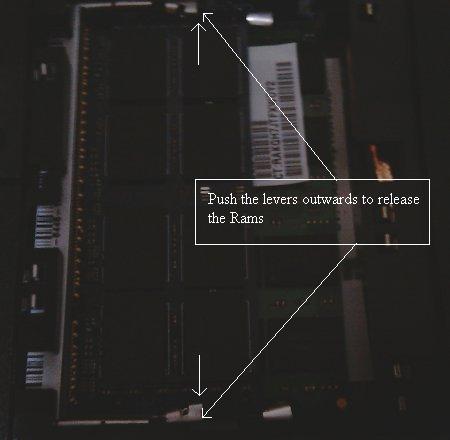
In order to release the rams, you will need to push the levers at the two ends in the direction as shown in the diagram. Use a screw driver to push the levers and the rams will pop up elevated in a 45 degree angle. You can take it out using your fingers or also push the rams out using a screw driver.
Insert the new rams in the slots and screw up the compartment and you are done.
It will be beneficial to upgrade to the latest SSD hard disks as such hard disks are a lot faster than the normal sata hard disks.
Before you proceed to change the drive, it is a good idea to clone your current drive to the new drive so that you do not need to go through the whole process of installing everything all over again. If you are using a notebook that comes with a recovery partition, cloning the drive also allows you to retain the recovery partition so that you can still use the shortcut key to activate the restore to factory defaults. Use one of these freeware shown in this article to clone out your current drive to the new drive.
Buy a external hard disk case and put your new drive in the external case. Hook up the new drive via USB and it should get detected in your Windows. Run the clone software overnight and allow it to clone the whole drive over. Once done, you can swap the drives out.
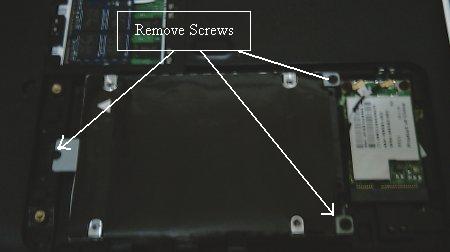
In order to extract the hard disk in this example, you will need to remove the 3 screws holding the hard disk before you can do anything.
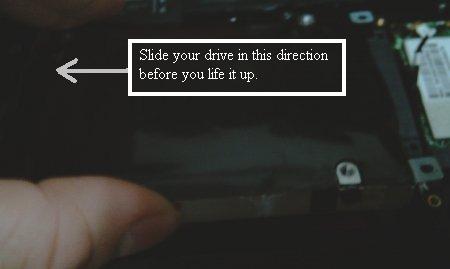
Remember that every notebook is different. This is a Compaq Presario CQ40 series. Once you have removed the 3 screws, you will be able to push the hard disk side ways. Slide it, and not pull it out because the hard disk is currently connected to the connector. It is quite tight, so you will need to use a lot of force. Once you slide it out, you will be able to lift it up and have it removed.
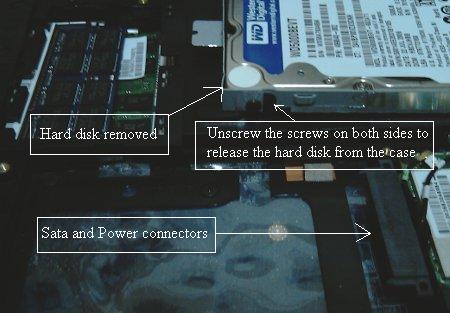
You will need to remove the screws holding the hard disk onto the holder at the sides in order to take out the hard disk. Actually, if you ask me, this holder is redundant, if the new SSD hard disk does not fit into the holder, you can just hook up the new drive to the connectors directly without the case. Remember to use the sliding method to connect the new drive too.
Once you are done, screw back all the screws and compartments and Volia, you have upgraded your rams and hard disk.
I hope this article on notebook memory upgrade is helpful to readers out there who want to upgrade their notebooks themselves. It is not too difficult but I still advise users to go slowly when it comes to removing their hardware so as to reduce the percentage of them damaging their own computers.
2 Comments Already
Leave a Reply
You must be logged in to post a comment.
Thanks for this guide, it is very informative and the pictures just add to it. I wasn’t sure whether or not memory upgrade on laptops could be done, seems like you proved me wrong :)