Install Ubuntu HTC HD 2
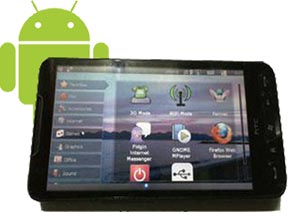 Welcome to a tech guide on how to install Ubuntu onto HTC HD 2. Just like many other installation of Android on HTC HD 2, this only difference is that this guide will allow you to run a full Linux Ubuntu operating system on a mobile phone. Maybe some tech geeks might be wondering why I am suggesting installing Ubuntu on a mobile phone when the screen is so small and limited, the reason is because a real desktop operating system will allow you to hook up an USB hub and make use of a real keyboard and mouse amongst other hardware. With mini mouse and fold-able keyboards in the market out there, you can instantly transform your HTC HD 2 into a full personal computer on the go. The best part is that you can do a triple boot of Windows Mobile, Android and Ubuntu on a single device. That is just so cool.
Step 1
Perform the HSPL and upgrading of Radio firmware
This step is the pre-requisite before installing any form of Linux or Android. I have already listed the steps so many times before in the multiple guides on installing of Android in HTC HD 2. Follow any of those guides to prepare your device until the stage before you copy the Android build over onto the SD card. Except that you will download and copy the Ubuntu build over onto the SD card. Simply paste the “Linux” folder as it is into the root of the SD card. Simply tap the HaRET.exe to start booting Ubuntu. This is one such guide you can use to follow.
Step 2
Configuring the device to use USB host
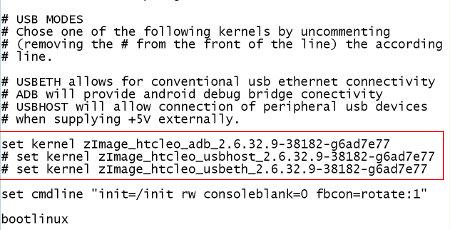
This Ubuntu build allows you to choose between 3 different services and kernels. You can only choose to load one of each at one time and not all 3. You can choose between these 3 modes.
set kernel zImage_htcleo_adb_2.6.32.9-38182-g6ad7e77
This mode has no purpose for most average users, it is meant for the pros who need to enable debugging mode when they hook up the device to the computer.
set kernel zImage_htcleo_usbhost_2.6.32.9-38182-g6ad7e77
This mode is to enable the USB connectivity mode so that you can connect USB devices like keyboard and mouse. Most users will usually opt to use this mode
set kernel zImage_htcleo_usbeth_2.6.32.9-38182-g6ad7e77
This mode is to allow you to use your HTC HD 2 as the internet tethering device when you hook up to a computer.
In order to make the device use the correct mode before starting up, you will need to edit the startup.txt in the “Linux” folder. Use any text editor to open that file. You will be able to find the command lines for the various modes at the end of the file. You will notice that the 2 out of the 3 lines have a “#” at the start of the configuration. Those with a hex at the front of the command line means it is disabled and not in use. Simply add a “#” on the kernel you wish to disable and delete the hex for the kernel you wish to use. Do not remove all the “#” because you want to use all three, that won’t be possible.
Step 3
Creating a start menu
In this Ubuntu 0.3 build, it is stated in the XDA thread that users may experience issues whereby the main menu interface of the Ubuntu netbook remix widgets are not loaded at all, leaving you a blank desktop with nothing to click on. They are working on this problem and hope that by the time they release a 0.4 version of Ubuntu, the problem will be solved and more features will be implemented
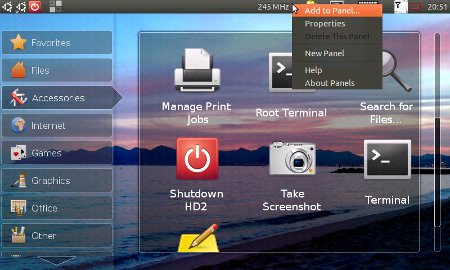
While a solution has been proposed on the XDA site to change the settings to load those widgets 2 seconds later, I have found a method to serve as the alternative. We can create a start menu on the menu bar so that we can still start programs off from there. In order to do so, you will need to right click on the space between the time and the icons on the top right corner of the screen. To emulate a right click using your finger, you will need to touch that area for 3 seconds before releasing your finger. You will get a drop down list that has the option to “Add to panel”. Scroll down the list of choices and look for the “start menu”. Click on “add” button and you will see an additional icon show up at the top left corner of the screen. You will be able to make use of that icon to bring up a menu that is quite similar to what you see in Windows, the Start Menu.
Step 4
Hooking up keyboard and mouse
It is possible to hook up a keyboard and a mouse to the HTC HD 2 that is running Ubuntu. But you will need quite a lot of wires and stuff to be able to do so. There are a few combinations that you can opt for. Lets see the list of hardware that you will need.
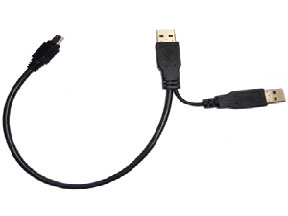
1. A USB Y-cable
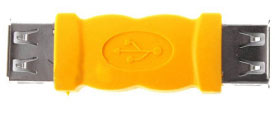
2. A USB extension connector
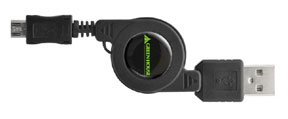
3. A USB to micro USB cable
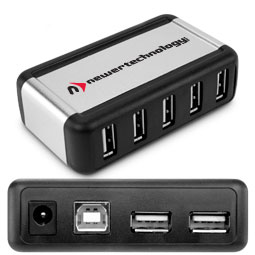
4. A USB hub ( one that allows external power to be supplied )
5. Optional ( USB to PS/2 cable )
Simply hook up everything as shown in the images you see below. There are a few different ways to connect and I will briefly describe what the differences are.
Type 1
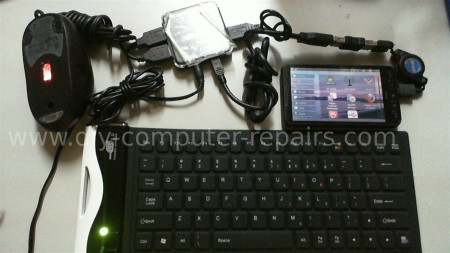
This first way of connecting the keyboard and mouse to the HTC HD 2 allows you to charge and use the device at the same time. Notice that even though there is only 2 USB devices connected, the hub itself has 3 connections. This is because, one of the ends of the y-cable goes back into the USB ports to draw power in order to provide the power to charge the phone as you are using the device. The thing to note for all types of connection is that the USB Hub must be powered before with the phone connected to the hub first before you turn on the device. You can hook up the other hardware as and when you wish. Any time the connection between the hub and the phone is disconnected
Type 2
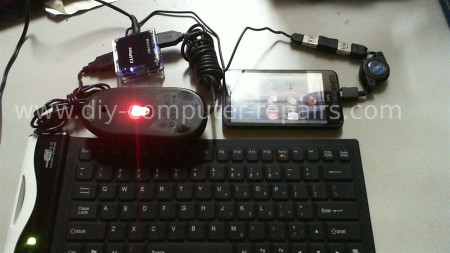
This is another connection that will allow you to use your peripherals except that you will not be able to charge as you use your phone. Your phone will drain its battery life over time, even though you have provided power to the hub. As with every connection you see, you must provide power to the USB hub or else nothing will work at all.
Type 3
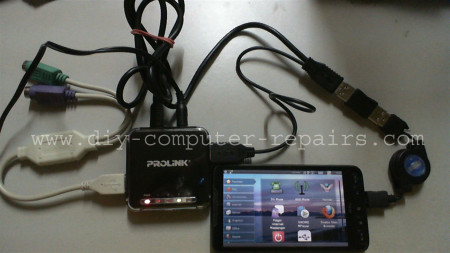
This connection is another alternative if you are using wired PS/2 keyboard and mouse. But if portability and minimum clutter is what you are looking for, I suggest wireless mouse and keyboard so that there will not be clumps and clumps of wire all over the place. This connection will allow you to charge your phone as you are using.
Type 4
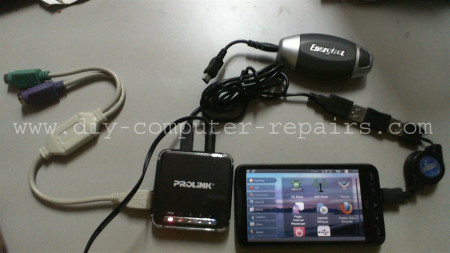
This option is meant for road warriors, similarly I will still advise users to opt for wireless options for the keyboard and mouse. Except that in this hook up, you can use portable power chargers to provide power to the USB hub. If you have the Y-cable setup, you can use as you charge, else you still can use the device except that the battery will drain over time.
I hope this article on how to Install Ubuntu HTC HD 2 is useful and interesting to computer geeks and noobs alike. Even though having a Linux operating system running on a smartphone is kind of a overkill, who cares since you do not pay more to get that on your device. Further more, it is such a head turner that I am sure you will impress people around you. Even though this version of Ubuntu on HTC HD 2 is not perfect yet, whereby the sound is not working, as well as the flash for sites like Youtube. Rest assured that the XDA computer geeks are already working on a full functional Ubuntu for HTC HD 2 with sound and all. HTC HD 2 is one of the best devices that I have ever bought in my entire life.

Leave a Reply
You must be logged in to post a comment.