Dual Boot Windows Phone 7 And Android HTC HD 2 Installation Guide
 Welcome to DIY Tech Tips and Guides article on how to dual boot Windows Phone 7 and Android in a HTC HD 2. There are a few ways to sort out the installation on the net. In this article, I will list one of the simplest and more direct ways from the computer geeks at XDA to sort out the whole installation. This guide will work for the Euro HD 2 which is the 512 meg device and the T-mobile 1 Gig rom device as far as I know. I have actually used a guide that was meant only for the T-mobile on the Euro HD 2 and it works. Do note that you must backup all the data onto your personal computer since the entire process will erase everything.
Note: Diy Computers accepts no responsibility for you failing to read these instructions or carry out the procedure correctly. We have tested this method and know that it works perfectly, therefore your decision to proceed will be taken as your acceptance of full responsibility.
Step 1
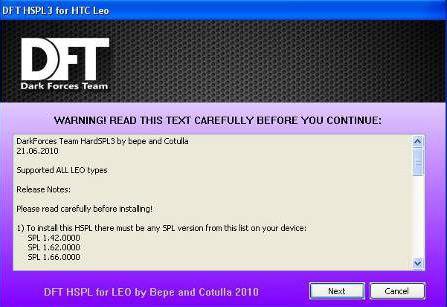
First off, once again you will need to flash the HSPL. You will only need to flash this HSPL once only no matter how many times you intend to hack or install various custom roms. If you know that you have HSPL-ed before, do not do it again. HSPL is the software that you will install to the device so that it is “cracked” to facilitate the flashing of any custom rom. Download HSPL here

Hold down the volume down button as you are turning on the device to check your SPL. You can download one of the HSPL that is compatible with the SPL that is in your device. If your device do not have the SPL that is supported by any known HSPL program, do not ever proceed with the flash as it may damage your device.

Step 2
Upgrade your Radio
Most Android builds run on a different Radio firmware from the Windows Mobile. Therefore it is necessary to flash a Radio firmware that happens to work with both operating systems, therefore, this Radio Leo 2.15.50.14.rar happens to work with both operating systems. Download and extract it to anywhere in your personal computer. Start the CustomRUU.exe file to update your phone to the newer radio if you have not done so already. You do not need to upgrade again if you already have this radio or a radio that happens to work as well. This upgrade can be done at a later stage if your device is unable to get onto the internet or receive any signals even after setting the APN.

Step 3
Install the MAGLDR
This is the special boot loader created by the people from xda developers. This MAGLDR is also the special program that users can use to flash Android right into the internal memory of the device if you intend to take the full plunge. It is said that Android builds loaded right off the internal ram will be many times faster then running off the SD card. Download the MAGLDR 1.3

Start the program from your personal computer and ensure that your device is hooked up and connected to the computer via Activesync. It will start off the flashing process just like any rom update program. Your device will reboot and stop at the MAGLDR menu. You have absolutely nothing on your phone now. Use the volume up and down keys to navigate the menu, and the green make a call button on the HTC HD 2 to enter menus. You can play Tetris with your HTC HD 2 now if you enter option 9. LOL…
Step 4
Install Windows Phone 7
You will now proceed to install the Windows Phone 7 rom onto your HTC HD 2. Download the HD2 1.01.00.WP7.rar. Extract the files to anywhere on your computer. You will now ensure that your phone is connected to the computer’s usb port. Navigate the MAGLDR menu to option 5 “USB Flasher”. Press the “green make call” button on the HTC HD 2 to start that option. You will see a simple “USB… USB” text message that means that the connection to your computer is functioning correctly. Double click on the DWI.exe to start the flash update of the Windows Phone 7. If everything goes smoothly, your phone will reboot and start up with the new Windows Phone 7 operating system.

Finalize all your settings of the Windows Phone 7 during the first boot. Click on the “arrow” and scroll to “settings”. Scroll down and select “About” to view the information in there. Make sure that the storage card is detected and displaying correctly. If you remove the storage card, you will get only 10 to 15 megs worth of storage which is wrong, and Windows Phone 7 will remember that as it is due you do a total reset by clicking on the “reset phone” option on this same screen. Do not remove the SD card when the phone is still drawing power.
Step 5
Partitioning your SD card for Android
Press and hold on to the “red hang up phone button” and allow Windows phone 7 to shut down. It will display the message “Good Bye”, but do not ever remove the SD card not until the message is gone and no power is going through the phone. You can press the “home button” just to check for signs of life on the phone.
After that, remove the SD card and insert it into any card reader in your computer. Download EASEUS partition program.
Install it on your personal computer and run the Easeus partitioning program. You should be able to see the SD card displayed in the partitioning program as the last drive in the list. By the way, you really need to download this newer version of Easeus partitioning software. Older versions will not be able to detect.
You will be able to see that your SD card now has a 200 meg partition and a huge unformatted partition all the way to the end of your SD card. The unformatted partition is actually the special Windows Phone 7 partition created when you install Windows Phone 7. Right click on that unformatted partition and select delete.

Right click on that partition and select “Create”. Drag and resize the whole partition to around half of the SD card. Just make sure that allocation of the spaces results in having a larger capacity partition at the end. This is to prevent the situation whereby the spaces get swapped around due to some bugs or whatever arrangement issues. Remember to change the file system to “unformatted”. Click apply and let your system resize and apply the changes.

Check that you get this outcome at the end. A 200 meg fat partition, followed by a unallocated space in between and a unformatted partition at the end. Once you are sure you have done the correct partitioning of the SD card, take it out and insert it into your HTC HD 2.

Start up your phone, make sure your SD card is properly inserted before you start up the phone. Let it boot up and check the settings again. Click on the “arrow” => settings => about. Check the storage now. It should read 4 gig plus instead of the previously 7 gig plus. This step is required. In fact, I had the same thought previously as to why is there such a need to take out the card and insert it in again just to read the space. This process intention is actually to get Windows Phone 7 to write the settings into its configuration. If you skip this step, you will realize that the storage space will be only around 10 plus meg later on.
Step 5.1
Additional Formatting of the SD card
Shut down your HTC HD 2 and remove the SD card from the phone. Remember; wait till it is totally shut down before you remove the card. One tip you can use is to let it shut down then press and hold on to the power up button as it is powering up to let the device pause at the MAGLDR menu before you remove the card. Since it is stuck at the bootloader screen which means Windows Phone 7 is totally shut off and has no access to the SD card whatsoever.
Still using the Easeus partitioning program, you can click on “view” => “reload disk info” or simply shut the program off and run it again. Right click on the 200 meg partition and select “resize”. Drag the partition all the way to fill up the unallocated space. After that, right click and select “Format”. Set the format properties to Fat32 and cluster size to 32KB. Click ok and apply. Now your computer should be able to display the SD card as a drive but with only half of the size of your entire SD card.

Step 6
Install your Android
Copy your Android onto the SD card as per instructions to each individual build. After which, insert your SD card back into the phone and press and hold on to the turn on button to enter the MAGLDR menu. Use the volume buttons to navigate all the way to “option 10. Services”. You will be able to set the Android boot source and directory. Set that first then use the “back arrow” button to go back the menu. Then choose option 2 to boot Android SD. But anyway, not all Android builds actually run fine in a Windows Phone 7 dual boot, some builds will not boot up at all or even hang after entering the Android operating system.
Oh crap, now that is bad news. As always, I am the Mr nice guy and will spoon feed you with the solutions. Here’s one build that I tried and worked HTC DesireZ 2.1 . I think all desire HD builds should work fine. But anyway, this build that I tried was damm slow at boot up if you do not create swap file and ext 3 partitions. I will be writing an article on how to partition your SD card to create the ext 3 partition and Linux swap file for Android builds to run faster soon. Check out this article on how to partition SD card for a faster Android. One alternate build that might work too is the MDJ_FroYo_HD_v._4.6_MDJ_S78.0.7z. Extract the build to the SD card and paste this .img file (file number 23). together with the contents in the SD card. The .img file will speed up the Android build.
As for now, that build takes around 20 mins for first boot and every reboot and start up will take around 3 to 5 minutes. Even so, navigating inside is still ultra laggy and unresponsive. For this build, you will also need to start the “Rom Manager” app and run “Fix permissions”. This will fix any “Force close” errors that will arise soon in this build.
Okay folks, that is all for my tutorial on how to dual boot Windows Phone 7 and Android. I know there are a lot of questions like how to transfer files, music and get your activation key to start downloading of apps from the market store. I have some of these covered in the first Windows Phone 7 installation guide. You may check that article out. I hope everyone find this guide easy enough to follow. Cheers and enjoy yourselves, stay tune for more great guides coming right up in future from DIY Tech Tips and Guides.
8 Comments Already
Leave a Reply
You must be logged in to post a comment.
would this be good enough ? how would be hardware performance ?
Very fast for the Windows Phone 7. For the Android build, you will need to do the SD card partitioning for Android by following that article to make it smooth and fast
will it work on other windows 7 phones, like the lg optimus 7 and the samsung omnia 7?
Currently, I don’t think so yet. This guide is only meant for HTC HD 2. Those phones are too new, but XDA developers have started a thread and there is a possibility that someone might come up with the solution.
will it work on an unlocked HD2 vodafone netherland
Yes, I believe it will.
ok but till now u didnt mention how to install the android file….should i install it directly from PC to phone SD or should i put it on the SD card (after partitoning) and install it from their while syncronising.. i have concerns that it would overwrite the WM
For Windows Phone 7 Dual boot, it is much complex. But I will list it in such a sequence. I hope you can understand
1. Install HSPL, Upgrade radio and Magldr and all that jazz until Windows 7 is running on your HTC HD 2
2. Shut Down and power up again, but hold the “Hang Up” Button so that the phone freezes at the MAGLDR screen, before you remove the SD card
3. Do your partitioning etc.
4. Insert the SD card into the phone and start up Windows Phone 7 ( Go check the space, is it correct as you partitioned ? ) If no, let Windows Phone 7 format the card and repeat from step 2
5. Shut down the phone and power it up and once again, let it freeze at the MagLDR screen before you remove the SD card.
6. Insert the SD card into your computer and copy the Android over as per instructions by each unique build
7. Insert the SD card into your Windows Phone and now you should be able to use the MAGLDR to start your Android as well.
Note.: The purpose of freezing the phone at the MAGLDR is to ensure that the Windows Phone is really not running or checking the Phone in anyway. In any event, the phone detects the card being removed even if the phone has been switched off. It will format the card on the next boot up even if you have already copied the Android over or partitioned everything nicely.
The best practice is to make the phone freeze at the MAGLDR before you remove the SD card. Or simply take out the whole battery and try to turn the phone ON. Make sure the phone is really “Knocked out cold”